The Make and Take Gals enjoyed a baking day at Poh's this week to help stock up our freezers with holiday appetizers! Pam had to jet off to Texas, so we made doubles of everything so she would have hers to come home to. Poh's list of goodies that we would be making sure did work up our appetite. She kept us moving so we would not eat the fixins... trust me it was very difficult!
We started with spiced pecans; one batch cinnamon and the other pumpkin spice. Now this was the easiest but making them first could be considered good or bad. As the spices filled the air and the trays began to cool, each of us could be seen sneaking off to taste the little morsels.
Next was the beautiful Cream Cheese spread. Three layers of heaven. First the sun-dried tomato layer, than the pesto/Parmesan layer, and last the cream cheese and white pepper layer. Mold, chill and serve... this one shouts holiday party!
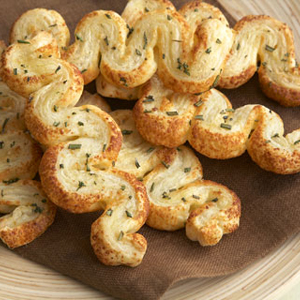
On to the puff pastry work station, three mouth watering recipes that were also great fun to make. Ya gotta love a dough that can be rolled out and made into just about anything, then bakes up into flaky layers of little art. We began with Samosa Puffs filled with potatoes, peas and an amazing spicy base; next were mustard and Parmesan bread-sticks; and last a blue-cheese and green onion mix that we also turned into bread-sticks.
After filling two layers of dough with mustard and cheese, I rolled out the layers and everything that ooozed out I spread back on the dough. You may not want to do this, but I could not bare to waste those luscious mustard seeds!
By now Poh knew she had better feed us lunch if we wanted any of the appetizers to survive. I struggled with the rolling of the dough and produced some pretty ugly samosas. We threw them into the oven to serve with lunch and they ended up being fairly presentable and tasted like a bit of India... bravo!
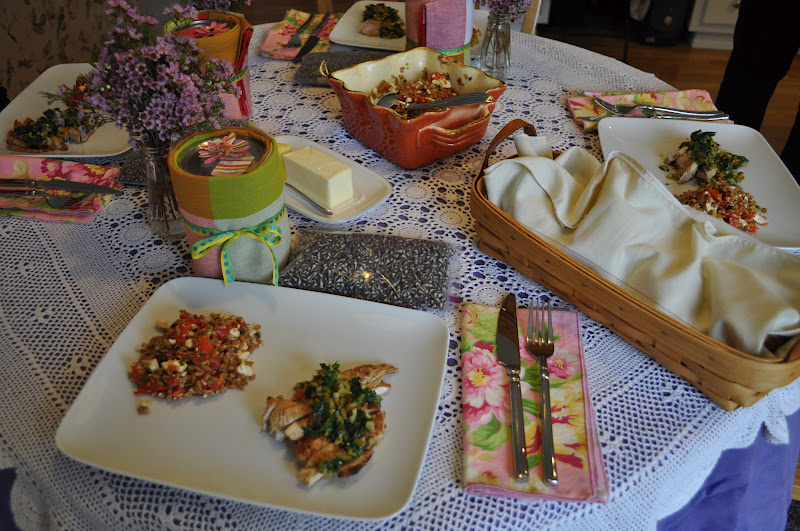
The rest of lunch was an amazing chicken stew, rice and a delicious salad with fall surprises of pecans, feta, and cranberry. Poh also made us favors to take home... Drunkards Fig Jam! Can't wait to serve that with cheese and crackers or maybe over baked chicken!
Poh wrapped lunch up with chocolate cake and ganache from a darling little cookbook called Miette, which is a hot spot bakery in San Francisco. Everything about this book is cute and the cake was moist and rich!
Recipes
Sun-dried Tomato and Pesto Torta
Adapted from Secrets from a Caterer's Kitchen
Ingredients:
Pesto Layer
- 1/4 cup chopped garlic
- 1 1/2 cups (packed) fresh basil leaves
- 1/4 cup pine nuts
- 2 tablespoons extra-virgin olive oil
- 1 teaspoon fresh lemon juice
- 1/3 cups cream cheese, room temperature
- 1/4 cup freshly grated Parmesan cheese
- 1/4 tsp salt
- 1/4 tsp ground white pepper
Sun-Dried Tomato Layer
- 1 1/3 cups drained oil-packed sun-dried tomatoes
- 1/3 cup tomato paste
- 1/3 cup softened cream cheese
Cream Cheese Layer
- 1 1/2 packages of cream cheese, softened
- 1 stick sweet butter, room temperature
- 1/4 tsp Kosher Salt
- 1/2 tsp ground white pepper
Preparation
Line a large mixing bowl, Charlotte mold, spring form pan, or any other attractively shaped 2quart container (we used several small rubermaid plastic containers lined with plastic wrap so that we could freeze and use for smaller events).
Finely chop garlic in processor. Add basil, pine nuts, oil and lemon juice. Process until well blended. Add cream cheese and Parmesan cheese. Using on/off turns, process just until blended. Transfer pesto to medium bowl.
Coarsely chop tomatoes in processor. Add tomato paste and process until mixture is almost smooth. Add cream cheese and blend well.
Using electric mixer, beat 2 cups cream cheese and butter in large bowl until fluffy. Season with salt and pepper.
Spray molds with nonstick spray. Line with plastic wrap, extending plastic over sides. Spread 3/4 cup cream cheese-butter mixture evenly over bottom of prepared dish. Top with half of tomato mixture, then 1/2 cup cream cheese-butter mixture, then half of pesto mixture. Repeat layering with 1/2 cup cream cheese-butter mixture, remaining tomato mixture, 1/2 cup cream cheese-butter mixture and remaining pesto. Top with remaining cream cheese-butter mixture. (We did 3 layers only) Cover and chill overnight. (Can be made 3 days ahead. Keep refrigerated.)
Invert torta onto platter. Peel off plastic. Garnish with basil sprigs and toasted pine nuts. Serve with baguette slices or crackers.
Spiced Samosa Puffs
2 sheets puff pastry
Filling
- 1 1/2 pounds youkon gold, peeled and cut potatoes (boiled and cut into 1/2 inch chunks)
- 1 medium onion, finely chopped
- 2 green chilies, very finely chopped
- 3 tablespoons olive oil
- 2 to 4 tblsp minced fresh chile
- 1 tblsp garam masala
- 2 tblsp minced fresh ginger
- 2 tblsp unsalted butter
- 1 cup peas
- juice of half a lime or lemon
- 1/2 cup chopped fresh cilantro
- salt
Boil potatoes in salted water until tender. Save 1 cup potato water and set aside. Drain rest of water off potatoes. Heat oil in large skillet over medium heat; add onion, season with salt, and cook until very soft and slightly golden, about 3 minutes. Add the chile, cook another minute, then add the ginger and garam masala and cook until the mixture is fragrant, another minute or so. Dump the diced potatoes and butter into skillet. With spatula begin to fold to blend. OK if potatoes get mushey. Add a bit of potato water to make creamy, then add peas and lime juice. Fold until well blended. Taste and season generously with more salt and pepper. Let cool and fold in cilantro.
Preheat oven to 400 degrees and line 2 baking sheets.
Roll out pastry dough on lightly floured surface to 12x12 square and cut into 9 squares. Put a small amount of mixture onto each square, wet sides of pastry with a bit of water, fold into triangles and seal edges with fork. Place on cookie sheet and bake for 15-20 minutes or until golden brown.
Puff Pastry Ribbons
Adapted from PuffPastry.com
- Thaw: 40 minutes
- Prep: 15 minutes
- Bake: 15 minutes
- Cool: 2 minutes
Tip
Ingredients
1/3 cup crumbled Blue-cheese mixed with1/3 cup minced green onion
1/2 of a 17.3-ounce package Pepperidge Farm® Puff Pastry Sheets (1 sheet), thawe18 wooden skewers (8-inch)
OR
1/3 cup grated Parmesan mixed with
2 tablespoons Dijon Mustard
1/2 of a 17.3-ounce package Pepperidge Farm® Puff Pastry Sheets (1 sheet), thawe
18 wooden skewers (8-inch)
Directions
- Heat the oven to 400°F.
- Sprinkle a work surface with 2 tablespoons cheese. Unfold the pastry sheet on another the work surface. Brush the pastry sheet with water. Place the pastry sheet, wet-side down, onto the cheese. Brush the pastry sheet with water. Sprinkle with the remaining ingredients. Press the cheese mixture lightly into the surface of the pastry with a rolling pin.
- Cut the pastry sheet crosswise into 18 (1/2-inch) strips. Thread the pastry strips accordion-style on the skewers. Place the skewers onto 2 baking sheets.
- Bake for 15 minutes or until the pastries are golden brown. Let the pastries cool on wire racks for 2 minutes. Carefully remove the skewers from the pastries.
- Serving Suggestion: For a unique presentation, you can leave the pastries on the skewers and stand them in a pretty vase or glass.
Drunken Fig Jam
Adapted from Bon Appétit
October 2008
by Jill Silverman Hough
2 lemons
4 pounds ripe fresh figs (preferably black), stemmed, cut into 1/2-inch pieces (about 9 cups)
4 cups sugar
3/4 cup brandy or Cognac
1/2 teaspoon coarse kosher salt
Using vegetable peeler, remove peel from lemons (yellow part only) in long strips. Cut peel into matchstick-size strips (about 3 tablespoons).
Combine lemon peel, figs, sugar, brandy, and 1/2 teaspoon coarse salt in heavy large deep saucepan; let stand at room temperature 1 hour, stirring occasionally.
Bring fig mixture to boil over medium-high heat, stirring until sugar dissolves. Reduce heat to medium; continue to boil until jam thickens and is reduced to 6 cups, stirring frequently and occasionally mashing mixture with potato masher to crush large fig pieces, 30 to 35 minutes. Remove from heat.
Ladle mixture into 6 hot clean 1/2-pint glass canning jars, leaving 1/4-inch space at top of jars. Remove any air bubbles. Wipe jar threads and rims with clean damp cloth. Cover with hot lids; apply screw bands. Process jars in pot of boiling water 10 minutes. Cool jars completely. Store in cool dark place up to 1 year.